Get your smile
Contact us
Contact us
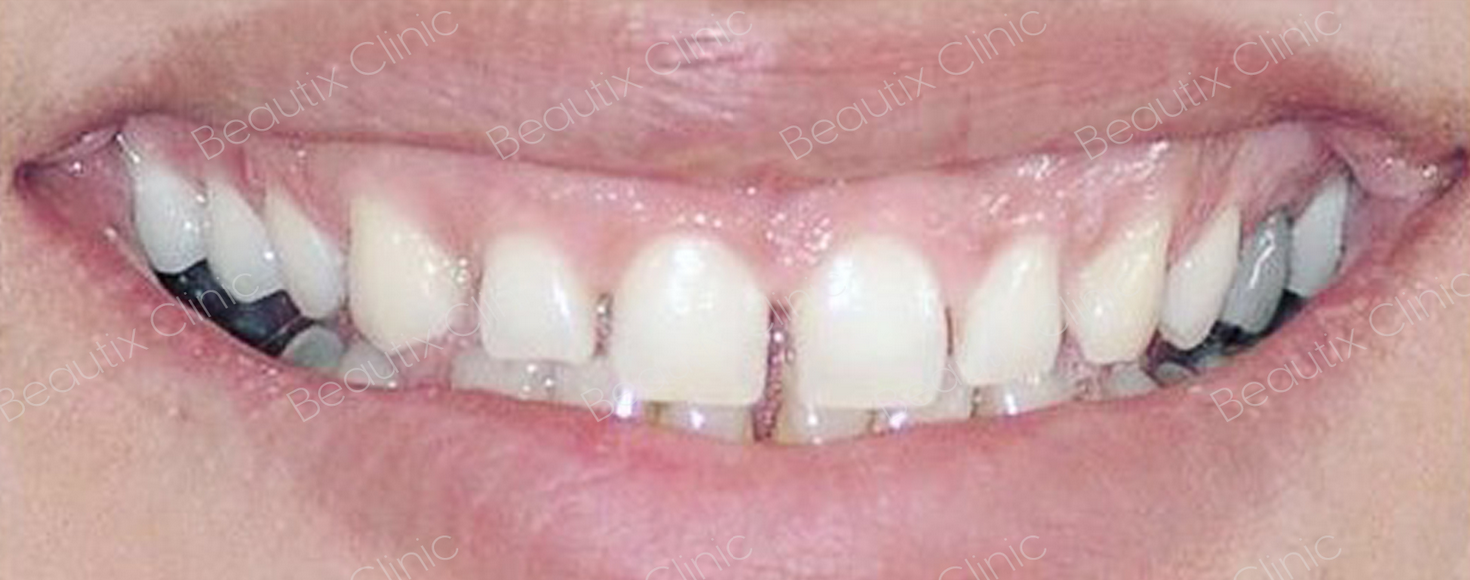
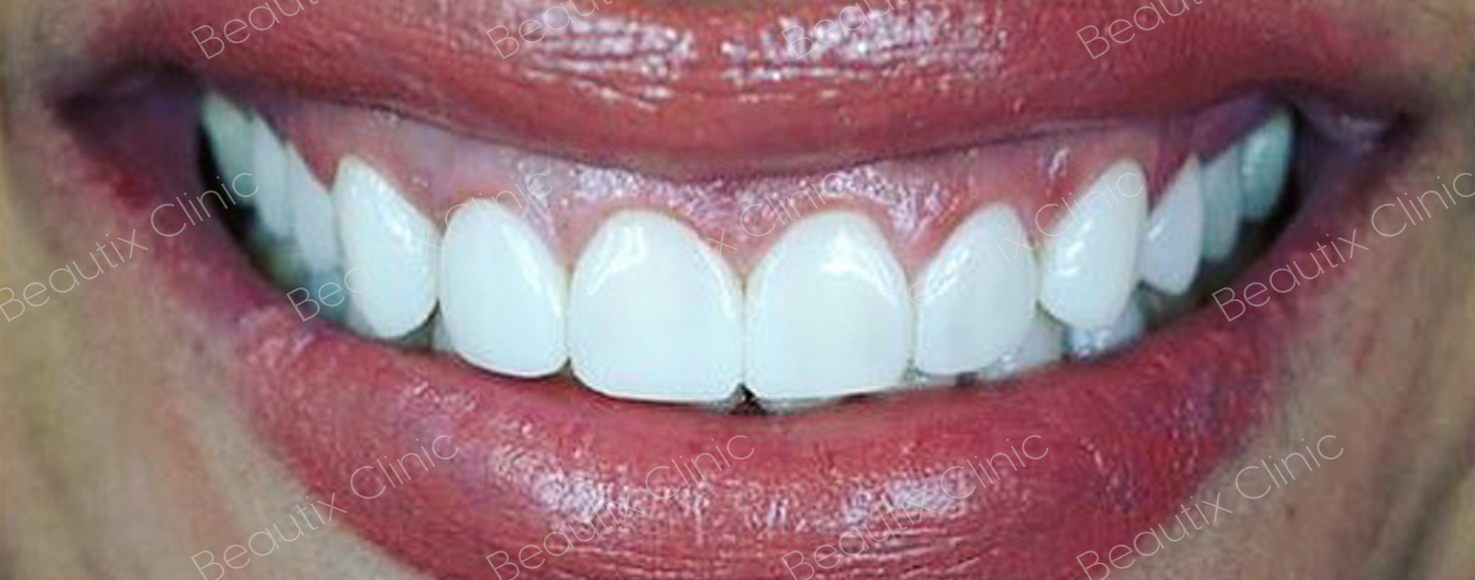
Hollywood smile is a full dental look makeover, which is a standard procedure nowadays
We aim to arrange your new teeth to look completely firm and shiny
The priority in the Hollywood Smile service is to design the most appropriate smile in light of the personal criteria set by our patients. Once the design is determined, the procedures to be applied will become clear
Hand rolling code is fun sometimes, but not ideal for getting projects done quickly or allowing clients to maintain pages.
Practicing oral care is very important. Brushing and flossing your teeth optimally three times a day is very helpful. Always try to avoid exposing your veneers to excessive forces.
We advise you to avoid clenching and grinding your teeth at any time.
Another helpful tip is to minimize staining factors such as drinking a lot of tea, coffee, or red wine.
Most of the general tooth care routine applies to your situation after you get your Hollywood Smile. You can take care of your teeth as usual.
The whole process of achieving a “Hollywood smile” takes 2 to 3 visits to the dentist
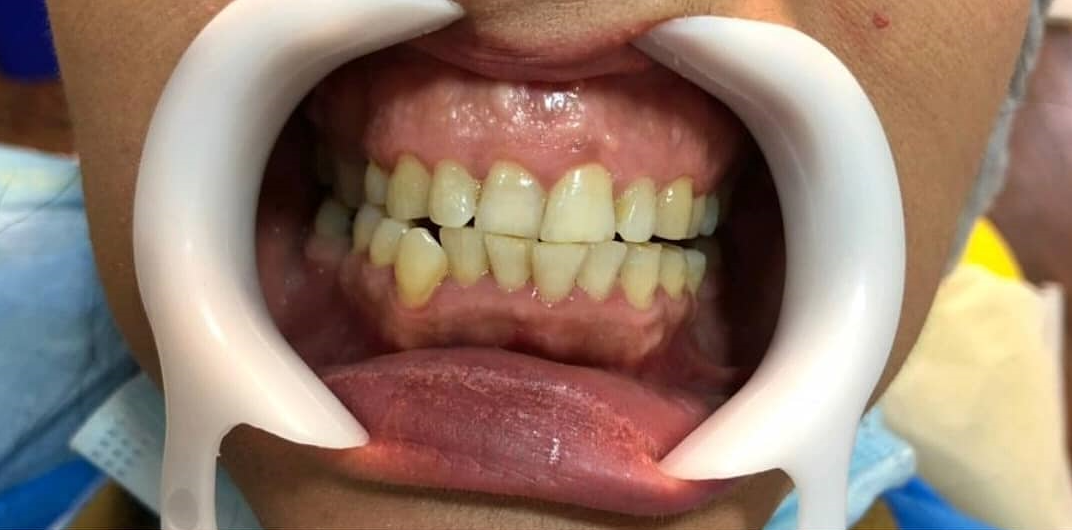
During the consultation and smile assessment, the dentist examines your teeth to determine if porcelain veneers is the right option for you. The details of the “Hollywood smile” procedure are explained, then the preferred shape, length, width and color of your new teeth are determined, and impressions and photographs of the patient’s mouth are taken.
The dentist begins working on the patients’ teeth, removing a very thin layer (half a millimeter) of tooth enamel to make room for the temporary veneer. Once the removal process is completed, a new dental mold is taken and sent to the lab to design and create the permanent porcelain veneers.
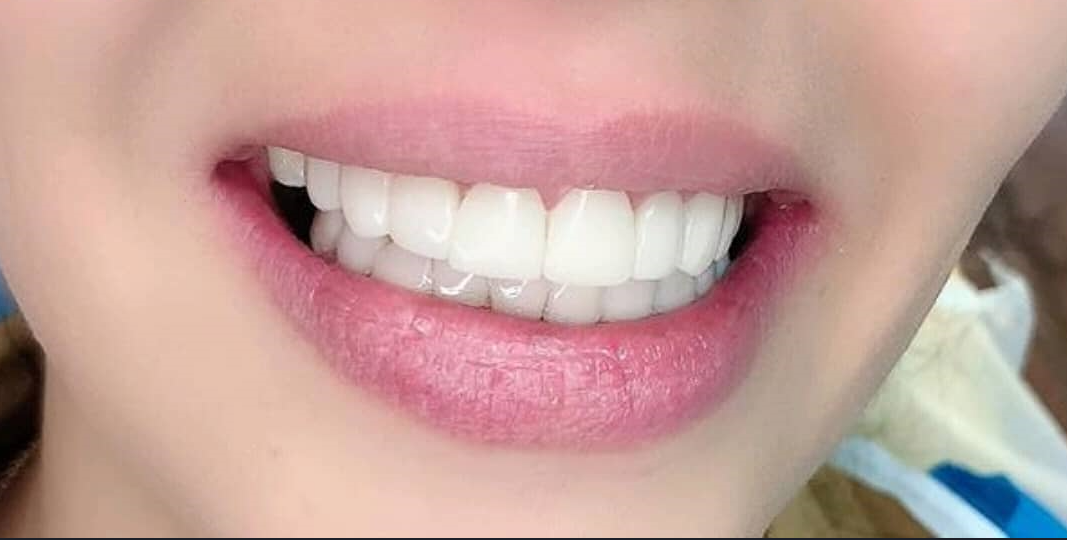
The dentist places dental veneers on your teeth for evaluation, and they are cut or adjusted to ensure the perfect fit.
Once the dental veneers fit perfectly, your teeth are cleaned, polished, and a drilling procedure done to apply the adhesive that will permanently hold the veneers in place.
A medical adhesive is placed on each veneer and then placed on your teeth
The dentist uses a special light on each veneer to harden the dental adhesive.
Once all dental veneers are fitted, the excess adhesive is removed and the bite evaluated
Thus, you have a wonderful Hollywood smile!
Consultation and smile assessment
Preparation
trial and permanent installation
© 2025 Beautix Clinic.

